


Managing support tickets in ZenCommunity helps you provide timely and organized customer support. With dedicated features for agents, ticket priorities, and private notes, you can ensure every user gets the right attention. Below is a step-by-step guide to help you manage tickets effectively.
Adding a Support Agent
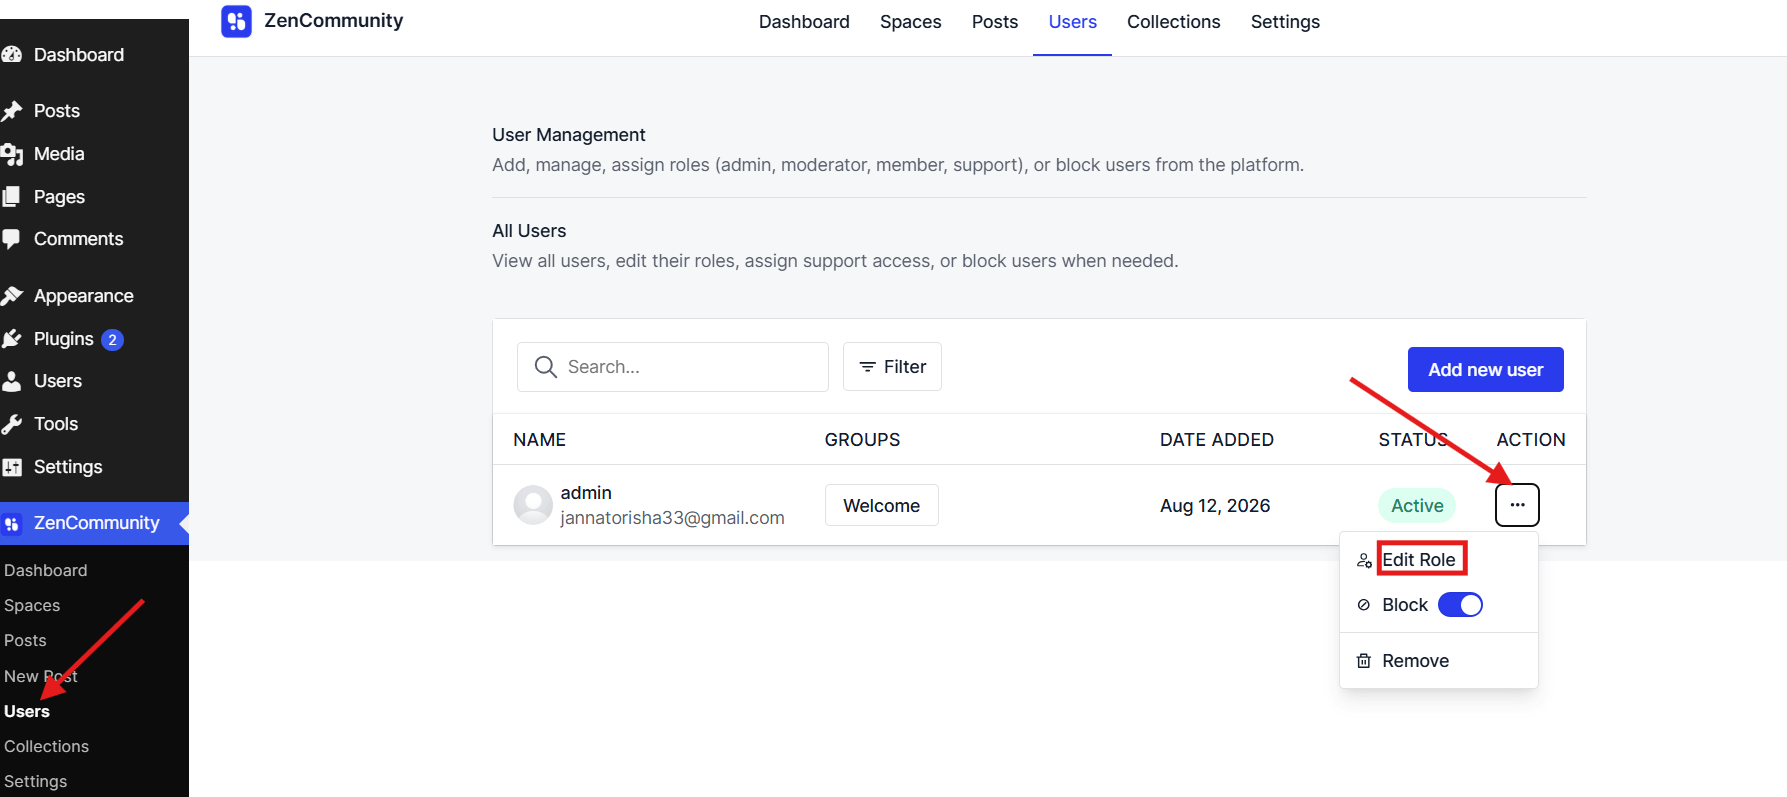
To assign users as support agents:
- Go to User Management Settings.
- Locate the user you want to make an agent.
- Click the three-dot icon beside their name.
- Select Edit Role.
- A window will appear. Enable the Support Agent option.
- Click Done to save.
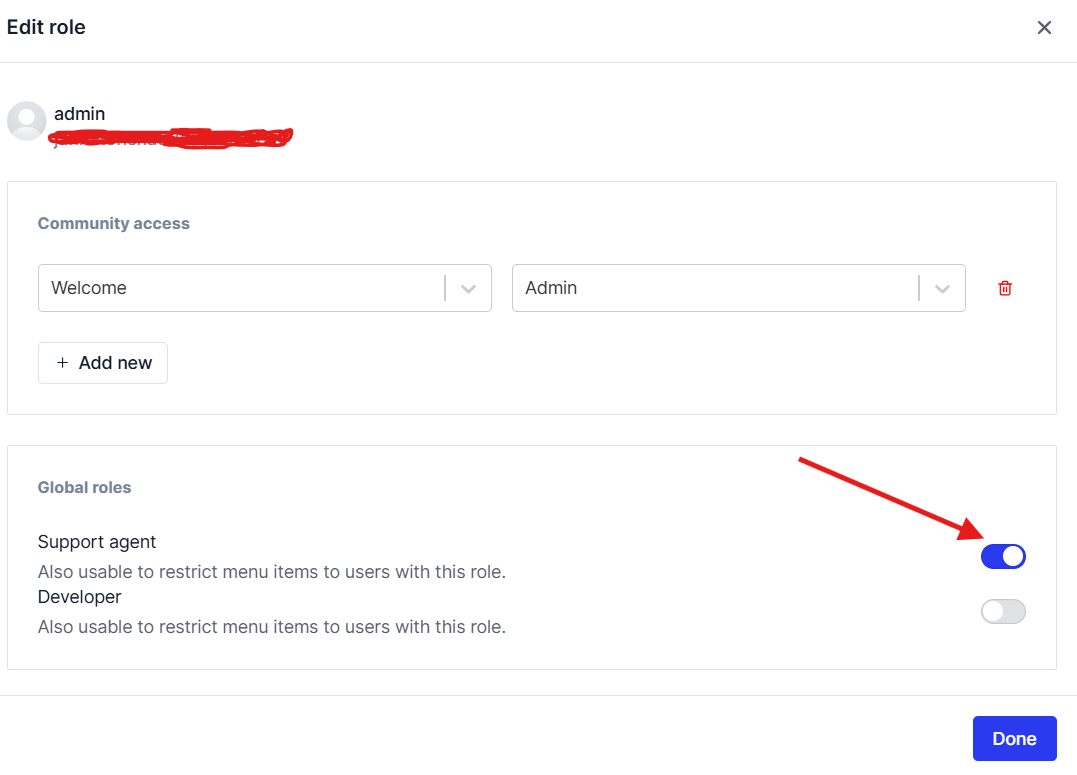
Now, the user is successfully added as a support agent and can manage support tickets.
Customizing Ticket Priority and Type
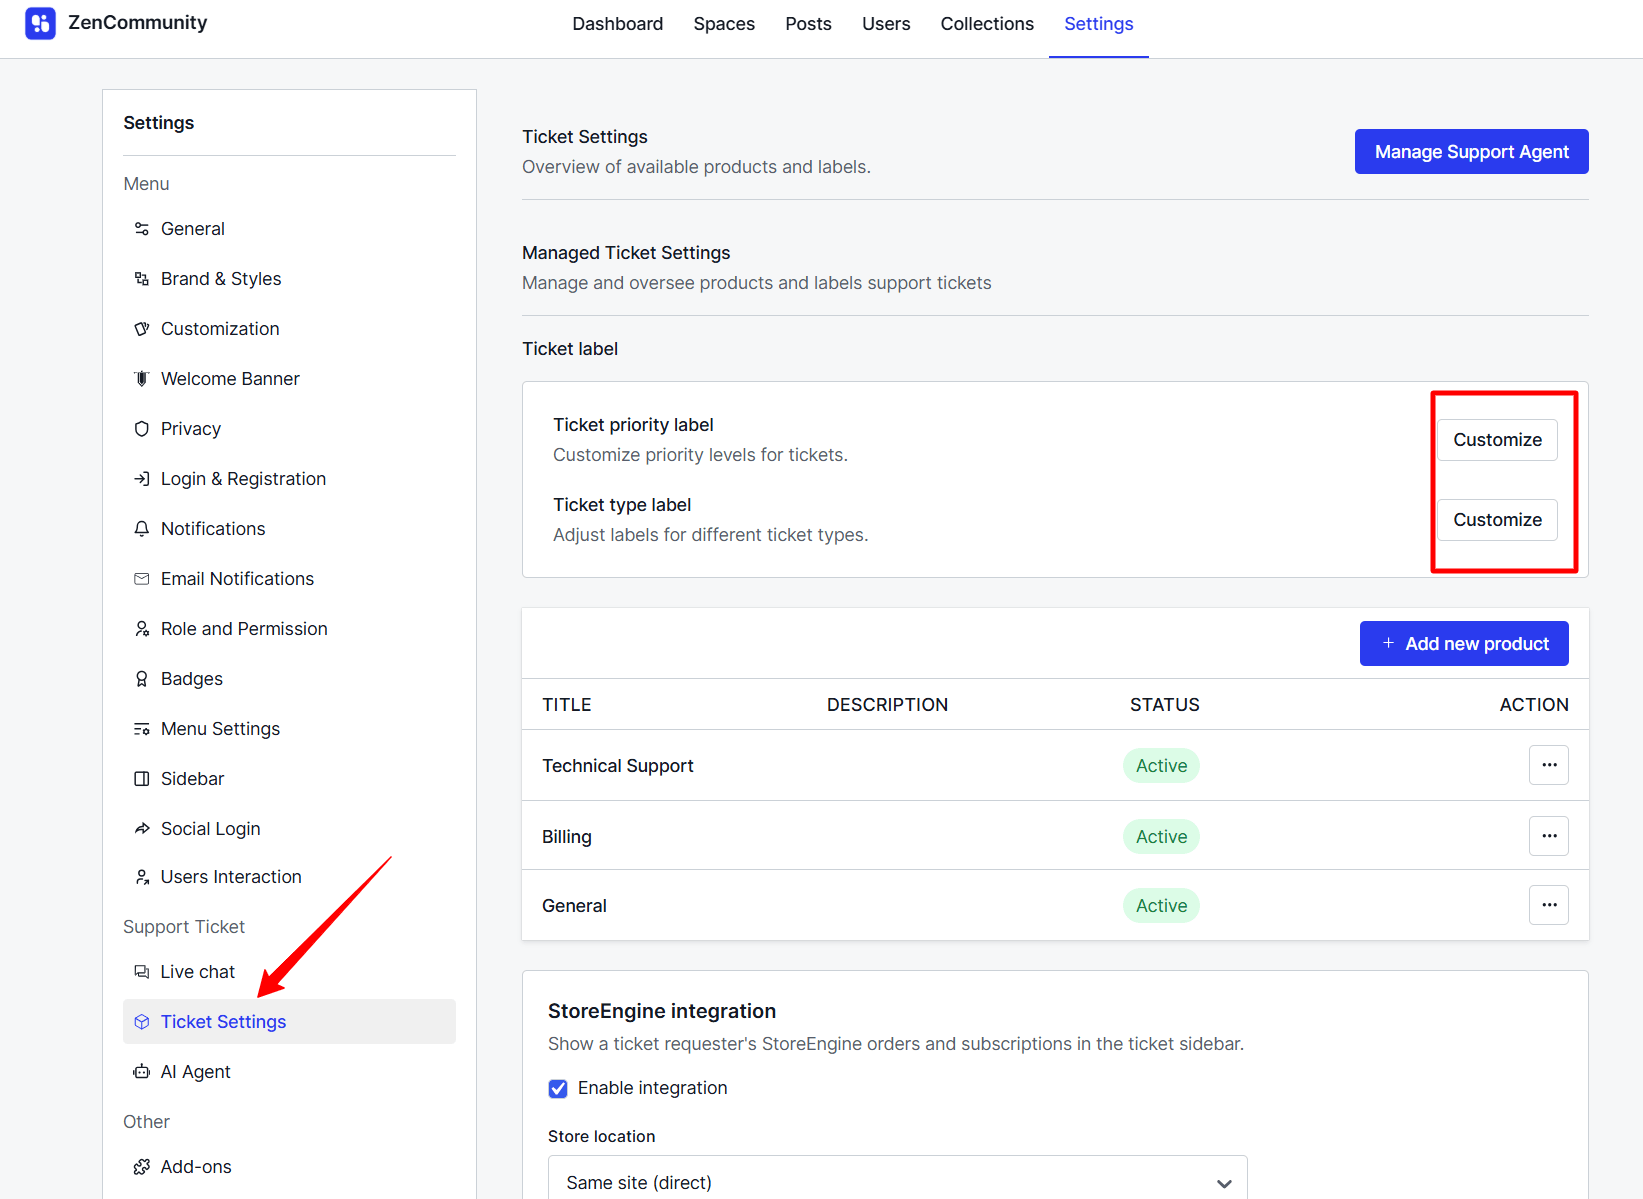
ZenCommunity allows you to create and customize ticket priority labels and types for better ticket categorization.
Adding Ticket Priority Labels
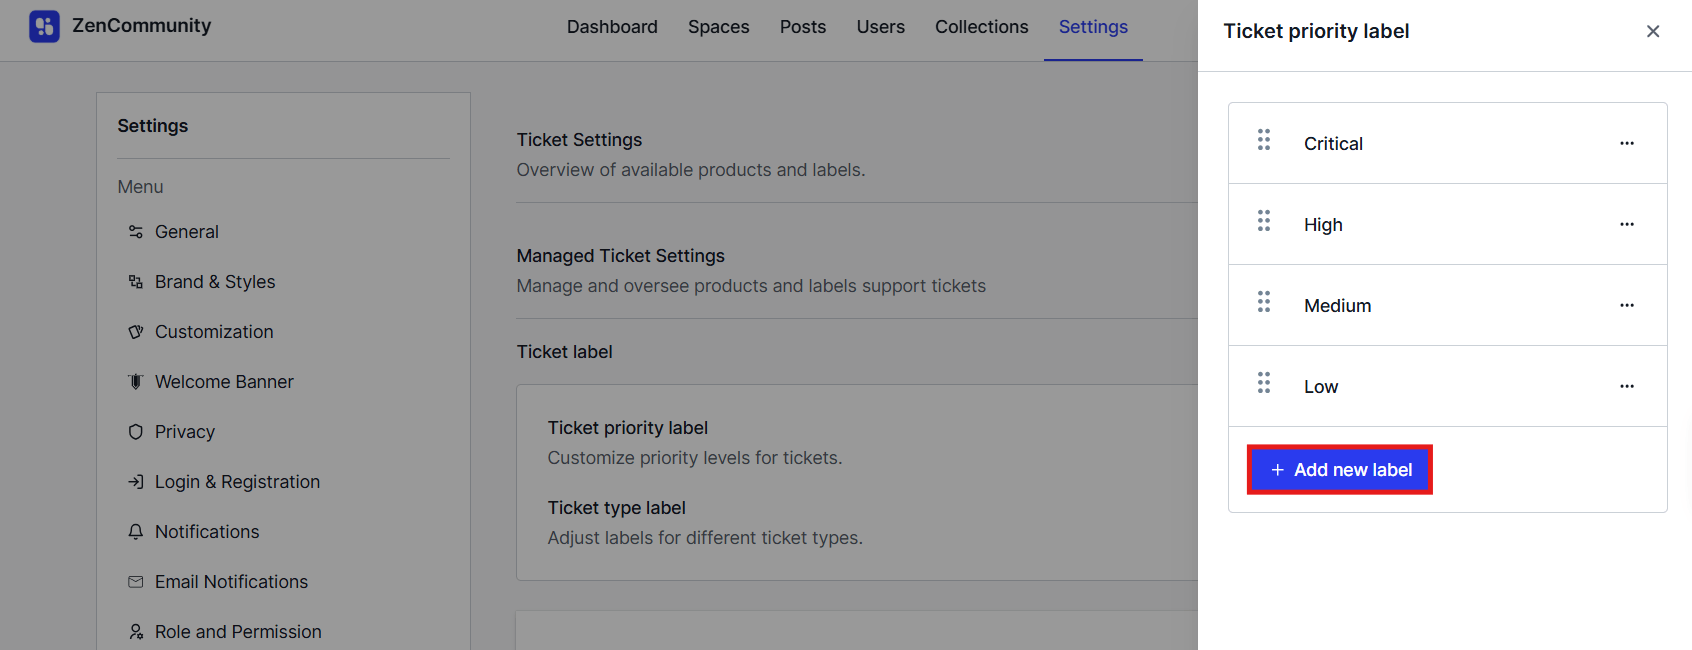
Navigate to Settings > Ticket Settings. Beside Ticket Priority Label, click Customize. A window will appear showing all existing labels. To add a new one, click Add New Label.
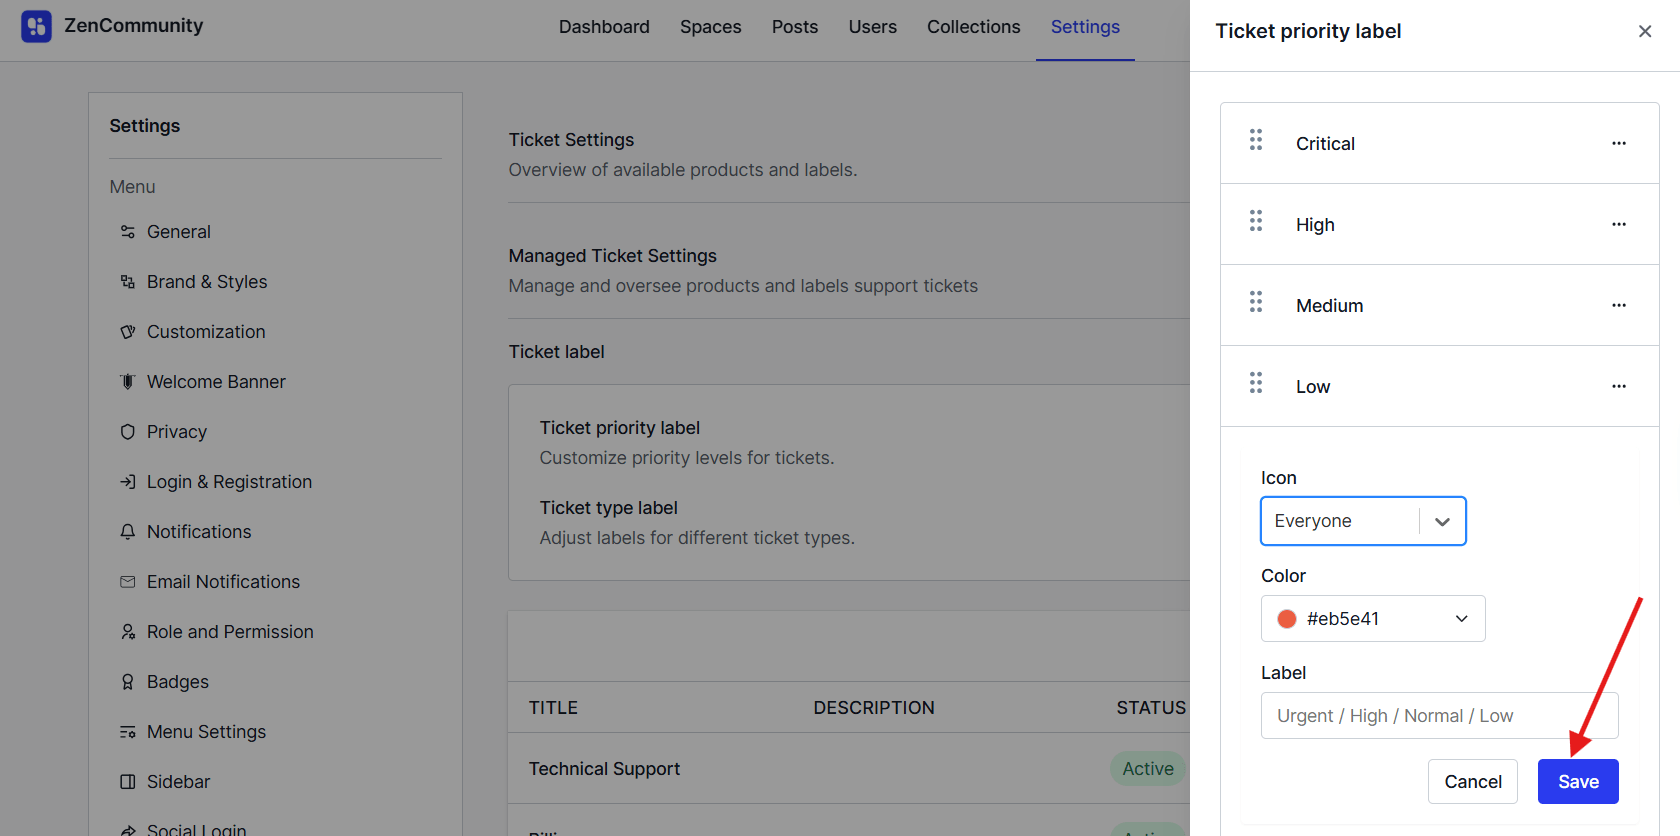
Select an icon, choose a color, set a label name, and click Save. Your new priority label is now ready to use.
Adding Ticket Type Labels
In the same settings page, click Customize beside Ticket Type Label. A window will open showing all ticket types. Click Add New Label.
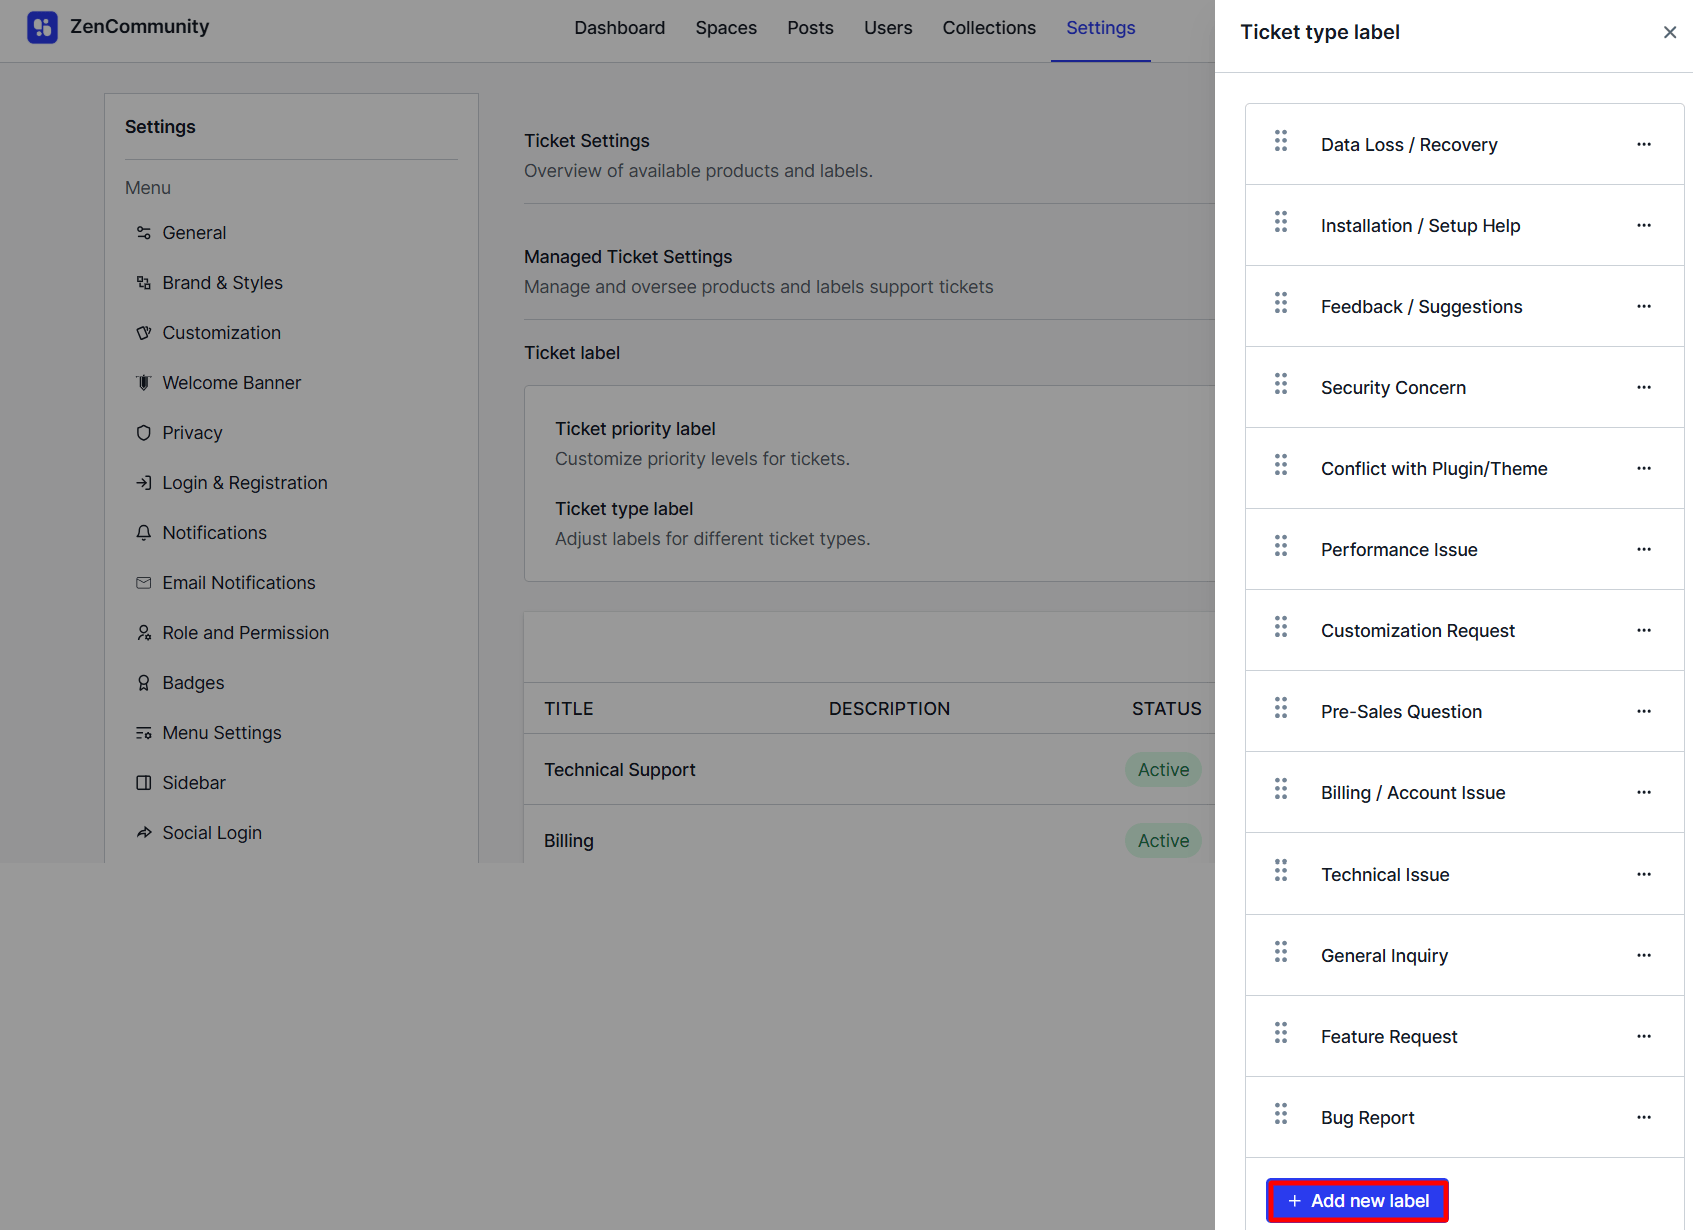
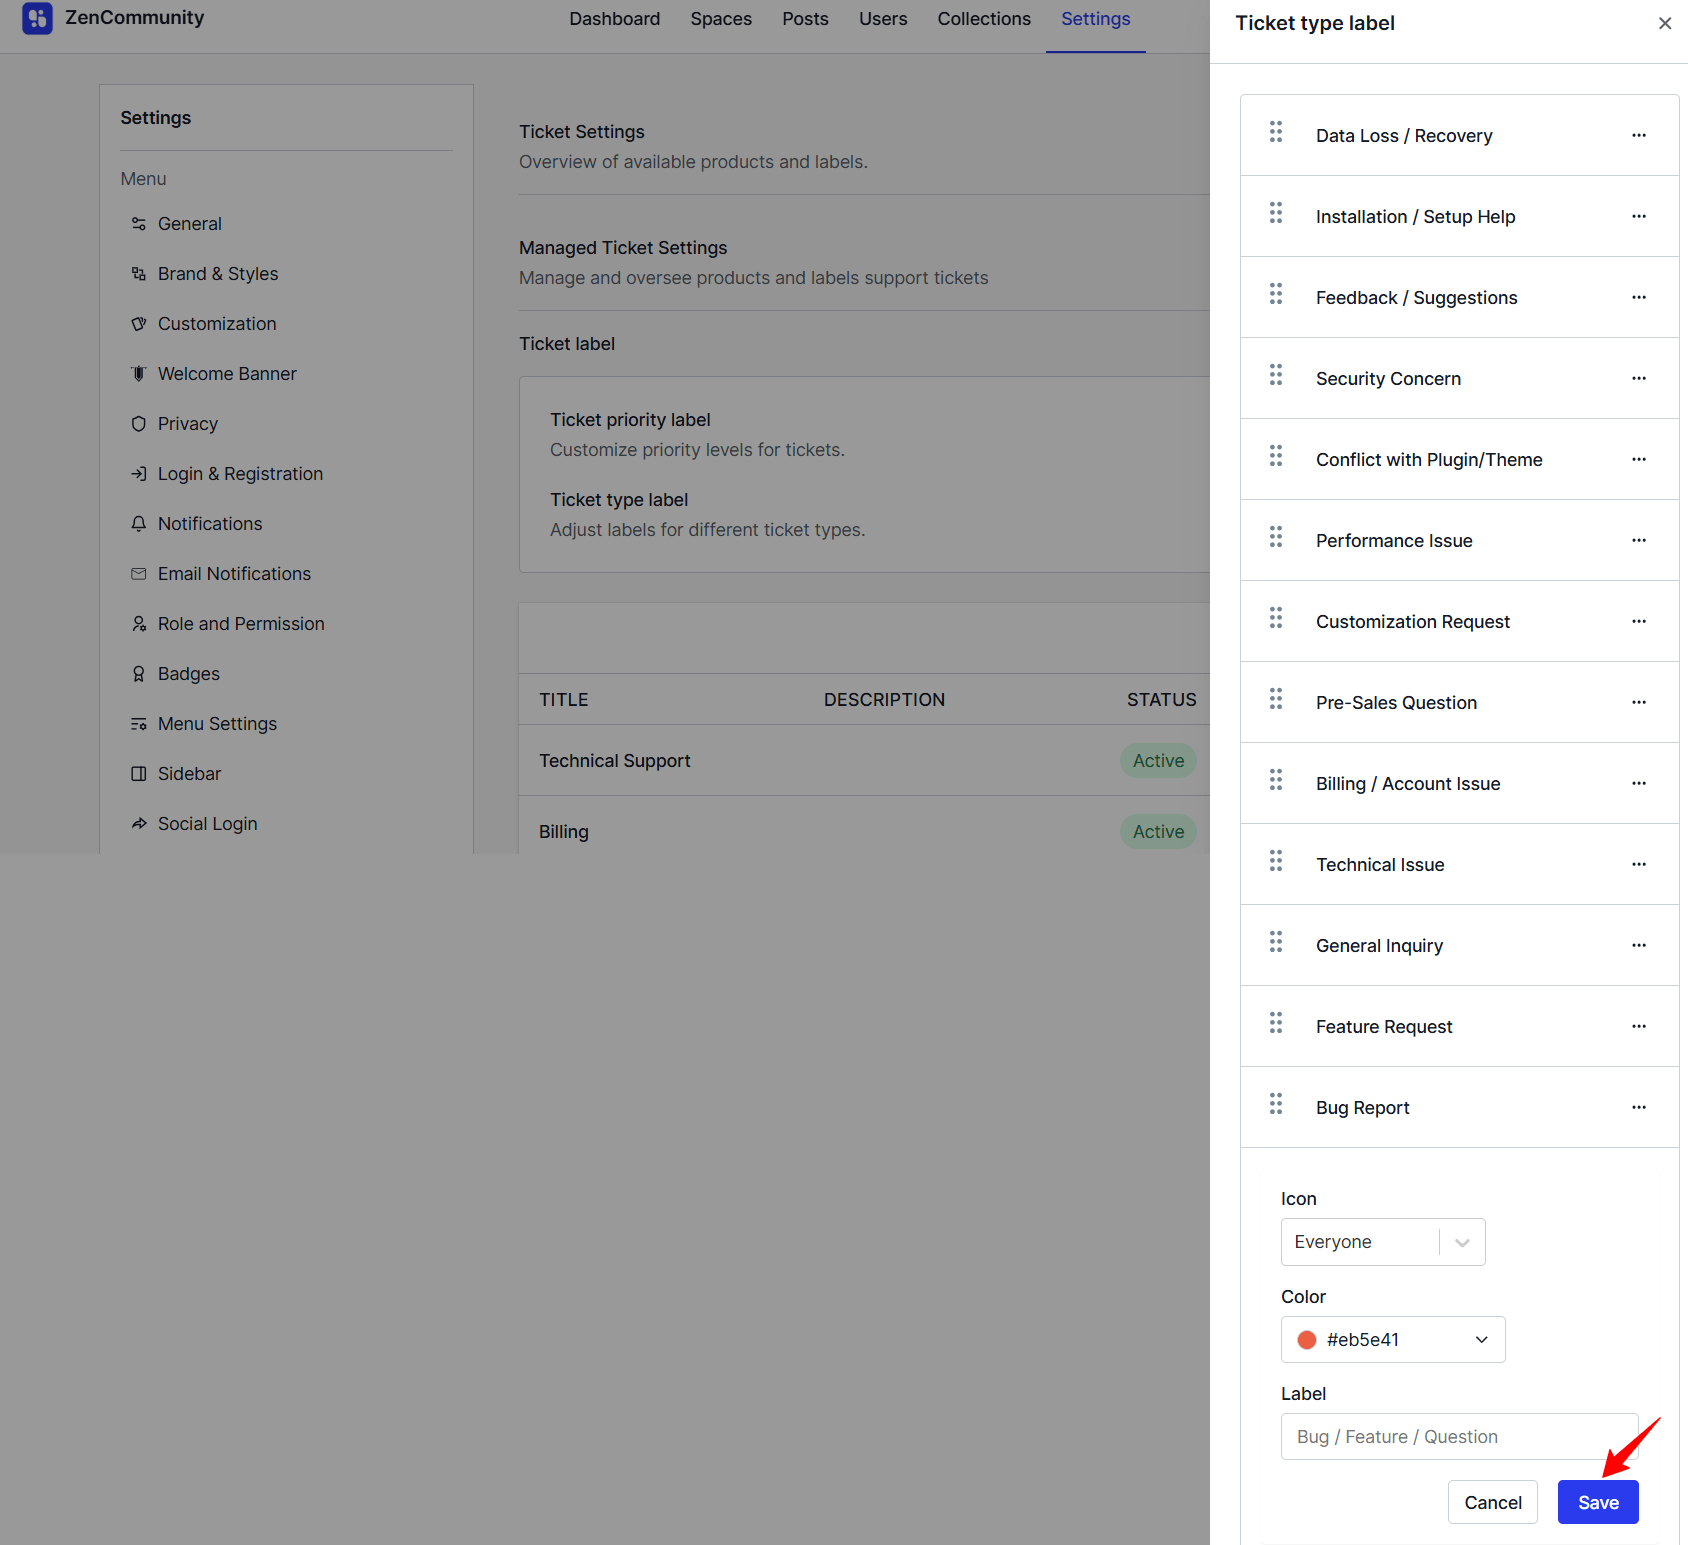
Select an icon, choose a color, set a label name, and click Save. Your new ticket type label will be added successfully.
Assigning a Support Agent to a Ticket
To assign an agent to a specific ticket:
Go to the Tickets section. You’ll see all tickets listed, with their assignment status. Open any unassigned ticket by clicking its Ticket ID.
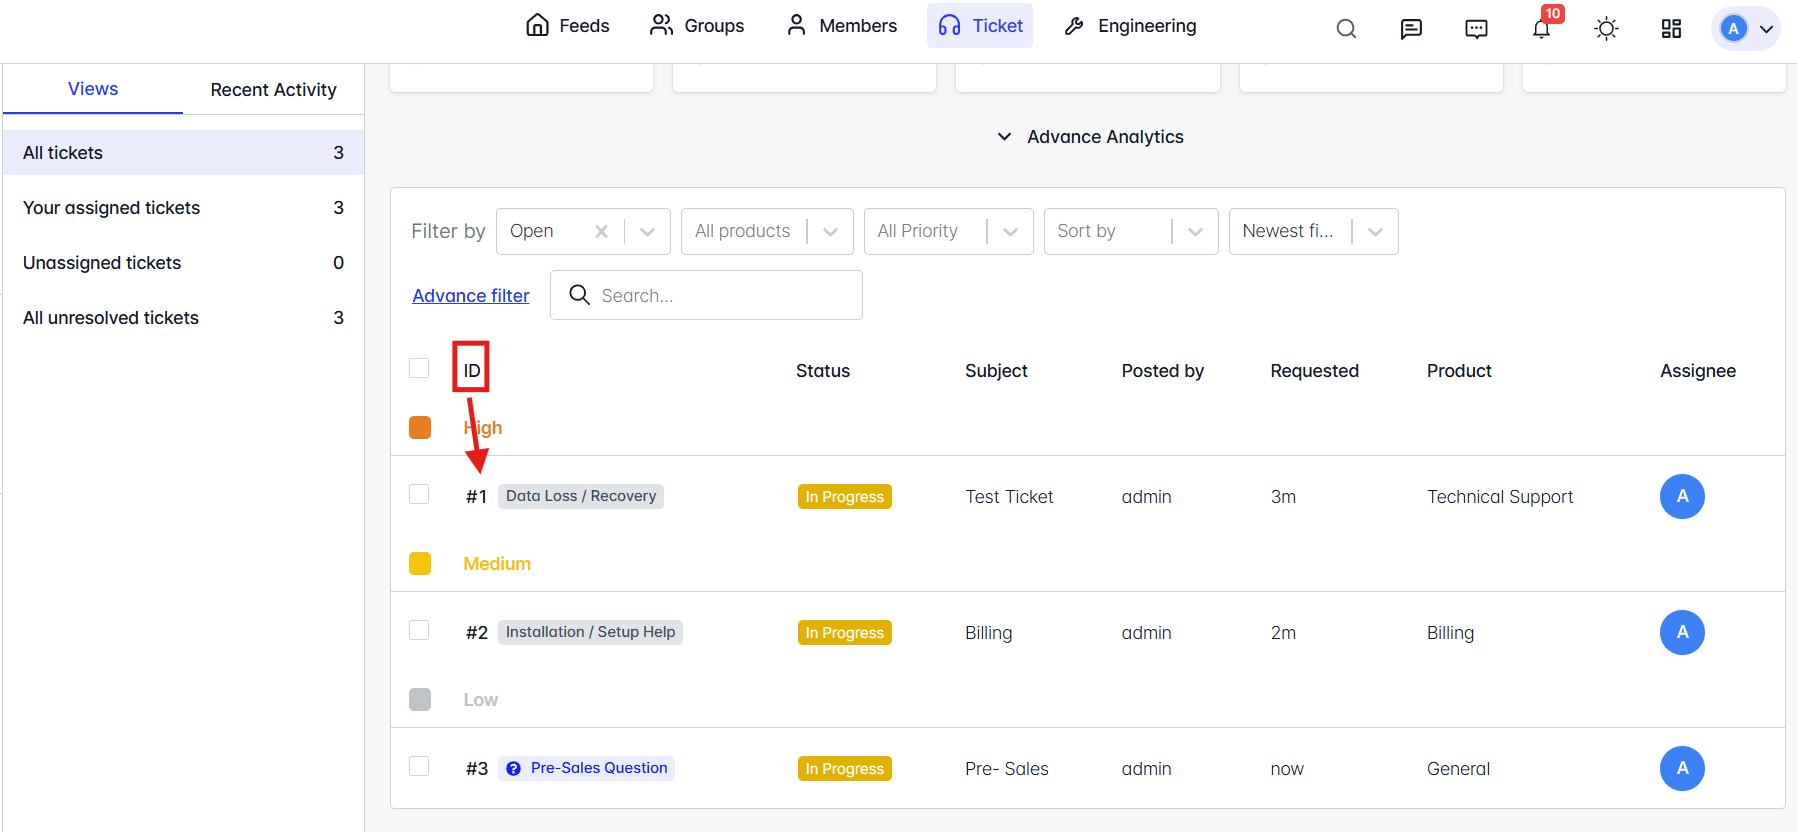
You can assign the ticket in two ways:
- If you reply to the ticket, you will automatically be set as the assignee.
- Alternatively, use the Assignee area in the right sidebar. Click it, then select an available support agent.
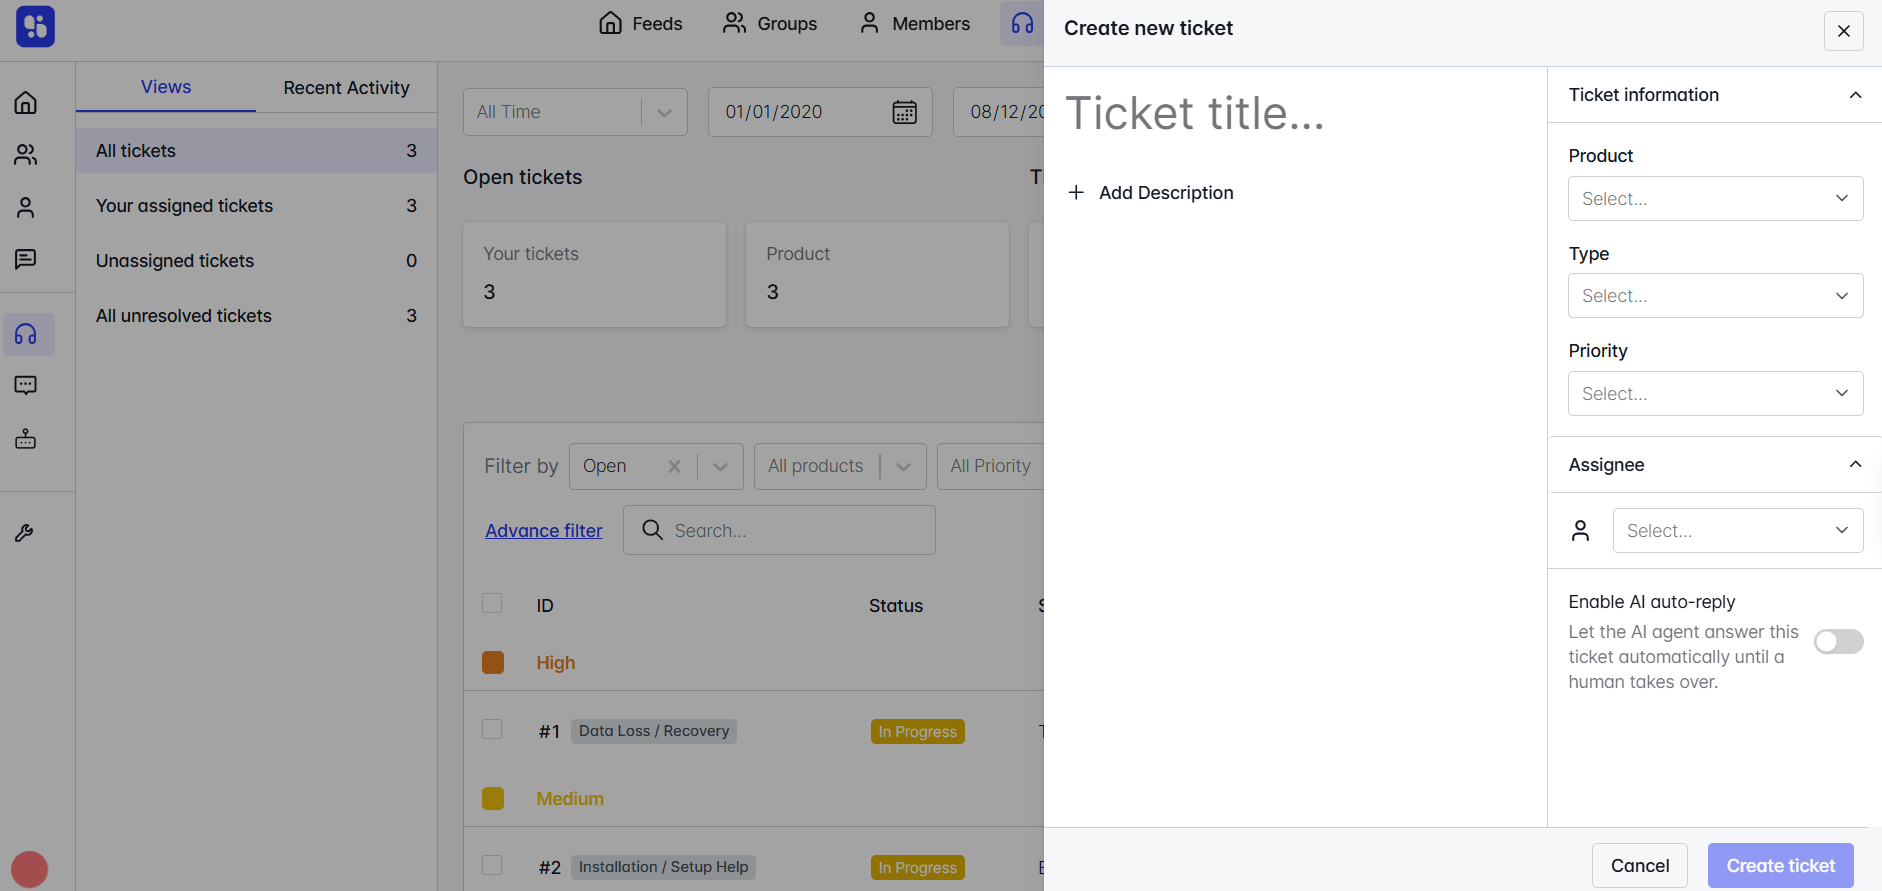
This ensures every ticket is handled by the right person.
Replying to a Ticket
When inside a ticket, you’ll find a reply box at the bottom. Simply type your response and submit it—this will be sent directly to the user as your official reply.
Adding Notes to a Ticket
ZenCommunity offers two options inside each ticket: Reply and Note.
- Reply Tab: For direct communication with the user.
- Note Tab: For internal notes.
You can use notes to:
Leave additional context for eamergencny purpose.
Create private notes (visible only to the user).
To add a private note:
- Go to the right sidebar of the ticket.
- Select the Private Note option.
- Write your note and save.
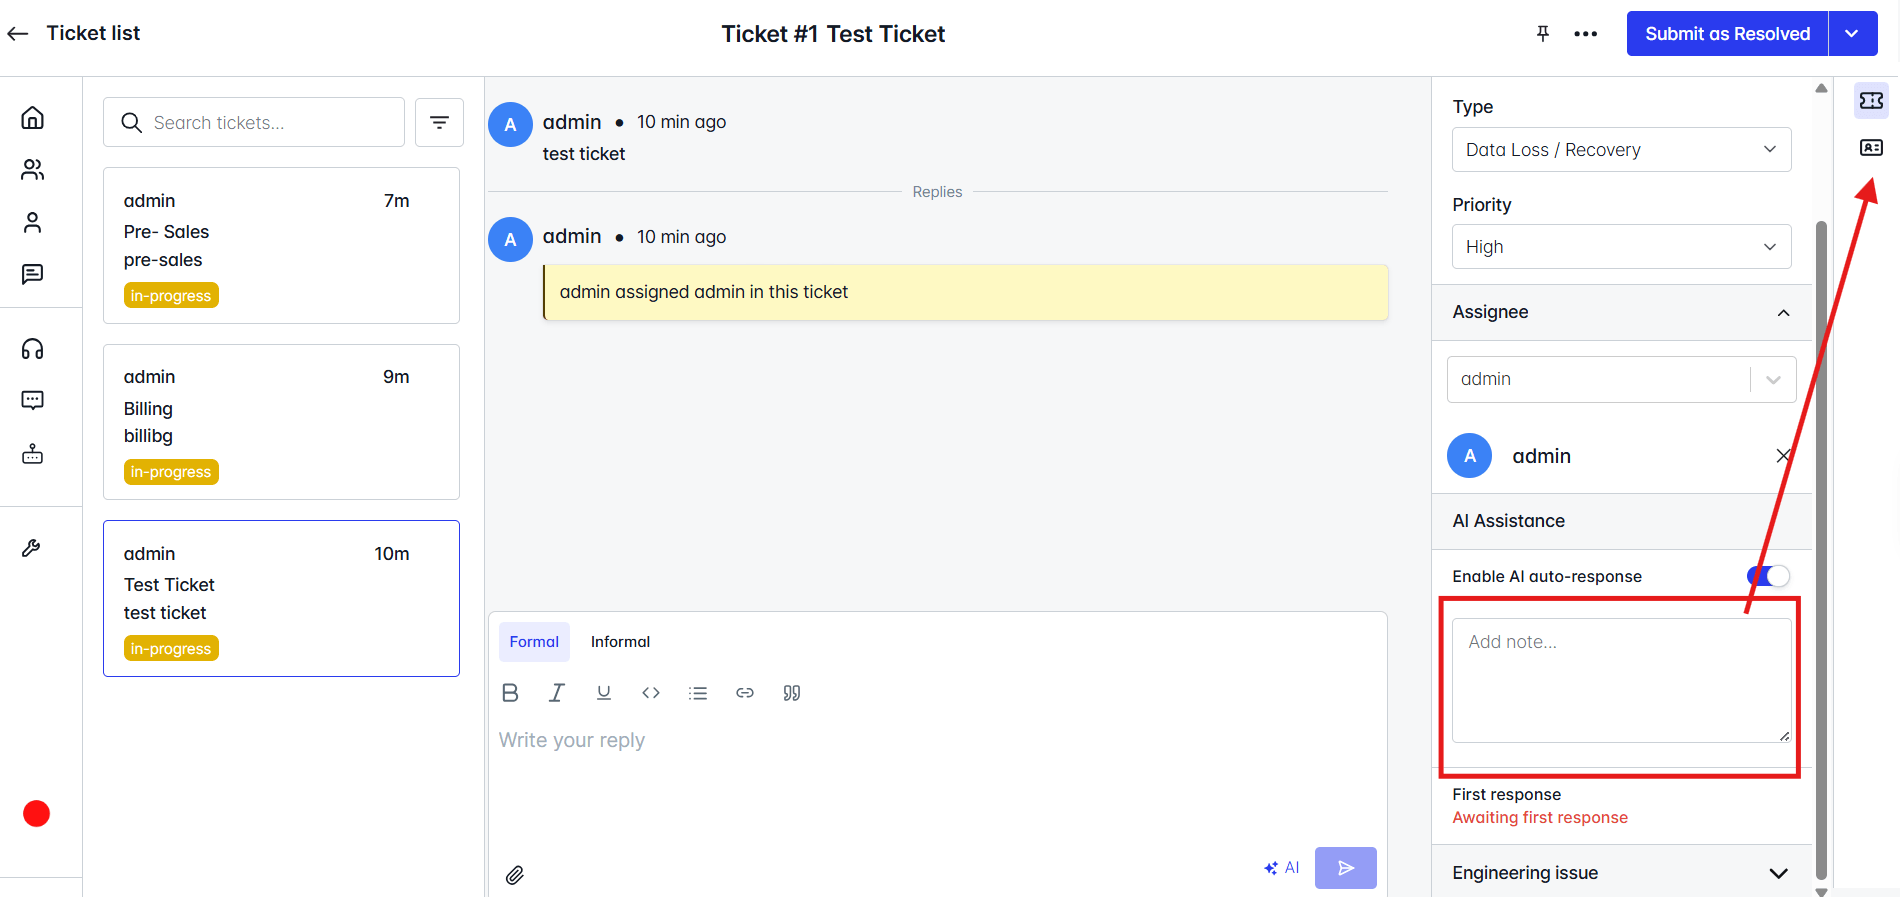
This keeps internal collaboration smooth without exposing extra details to users.